
How Storycrafter Works
Build engaging digital experiences with our streamlined, flexible workflow.
Step 1
Collect Your Digital Assets
Start by building a library of reusable digital assets: images, audio, video, and PDFs. There’s no need to upload multiple crops of the same image. Just upload a high resolution digital master, and the system will automatically generate the proper file size and format when you publish. You can also include metadata like titles, captions, and credits, which are then automatically included when you use an asset in a story.

Step 2
Build Your Story
Slideshow
Choose from over 100 different responsive slide layouts, and then add assets from your library. Experiment with different layouts to find the right match for your content. Our visual builder also lets you preview what your slideshow will look like on different devices, from phones all the way to large-scale touchscreens.
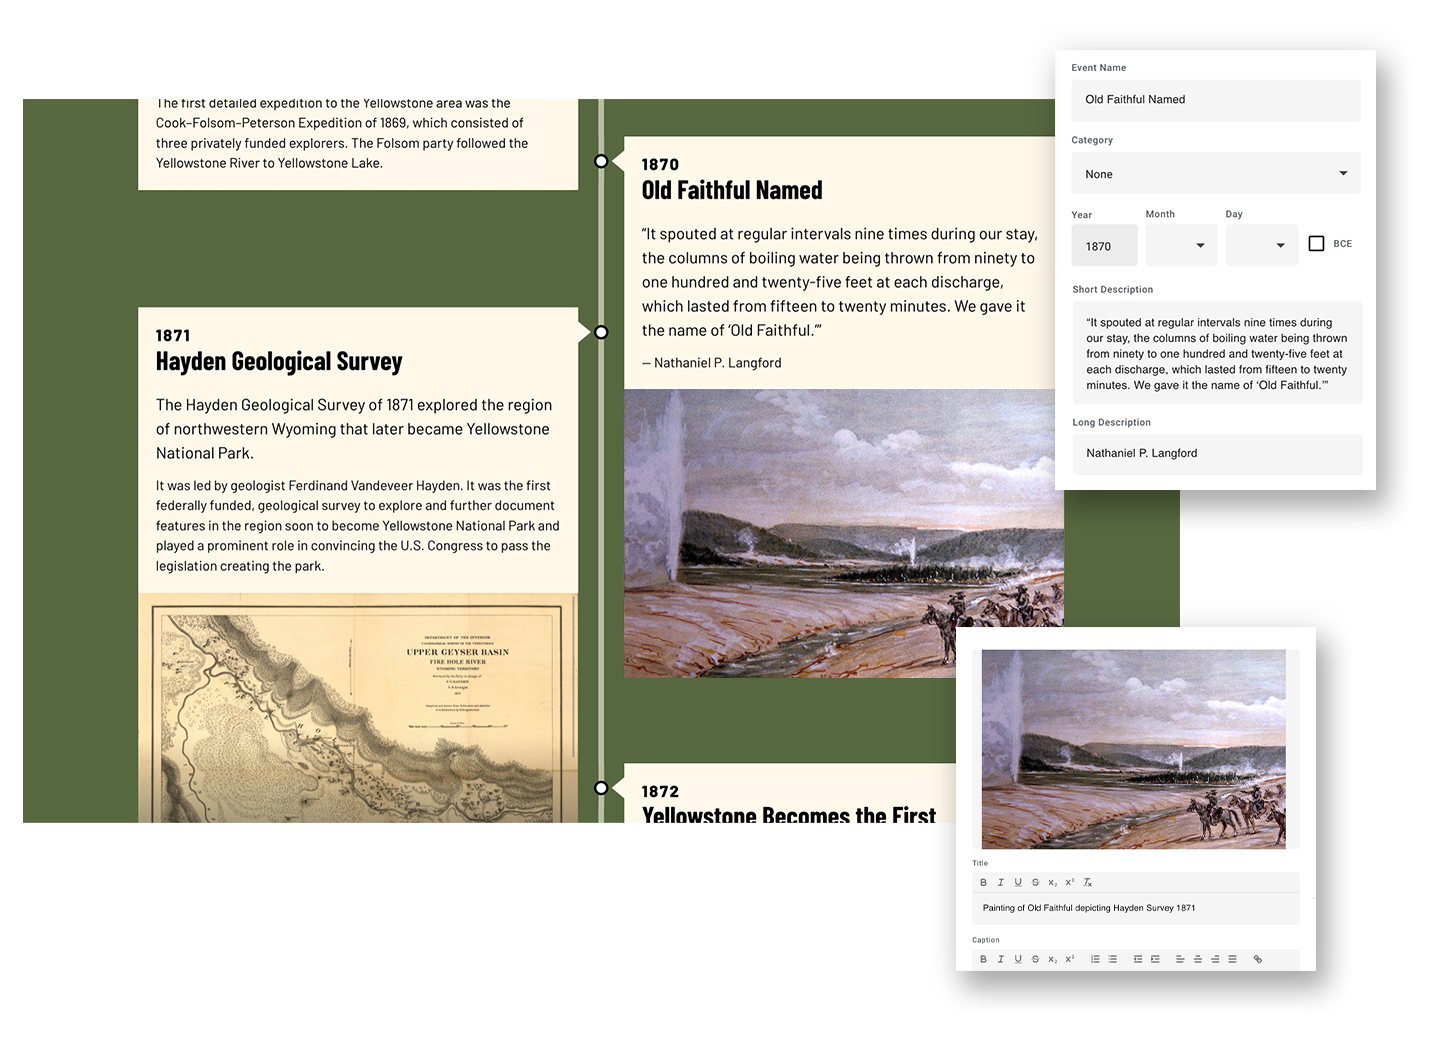
Timeline
Each entry in a timeline lets you add titles, dates, and multiple descriptions. Like other story types, you can add assets from your library to create embedded galleries. Timelines also support categories, so that your visitors can filter events.
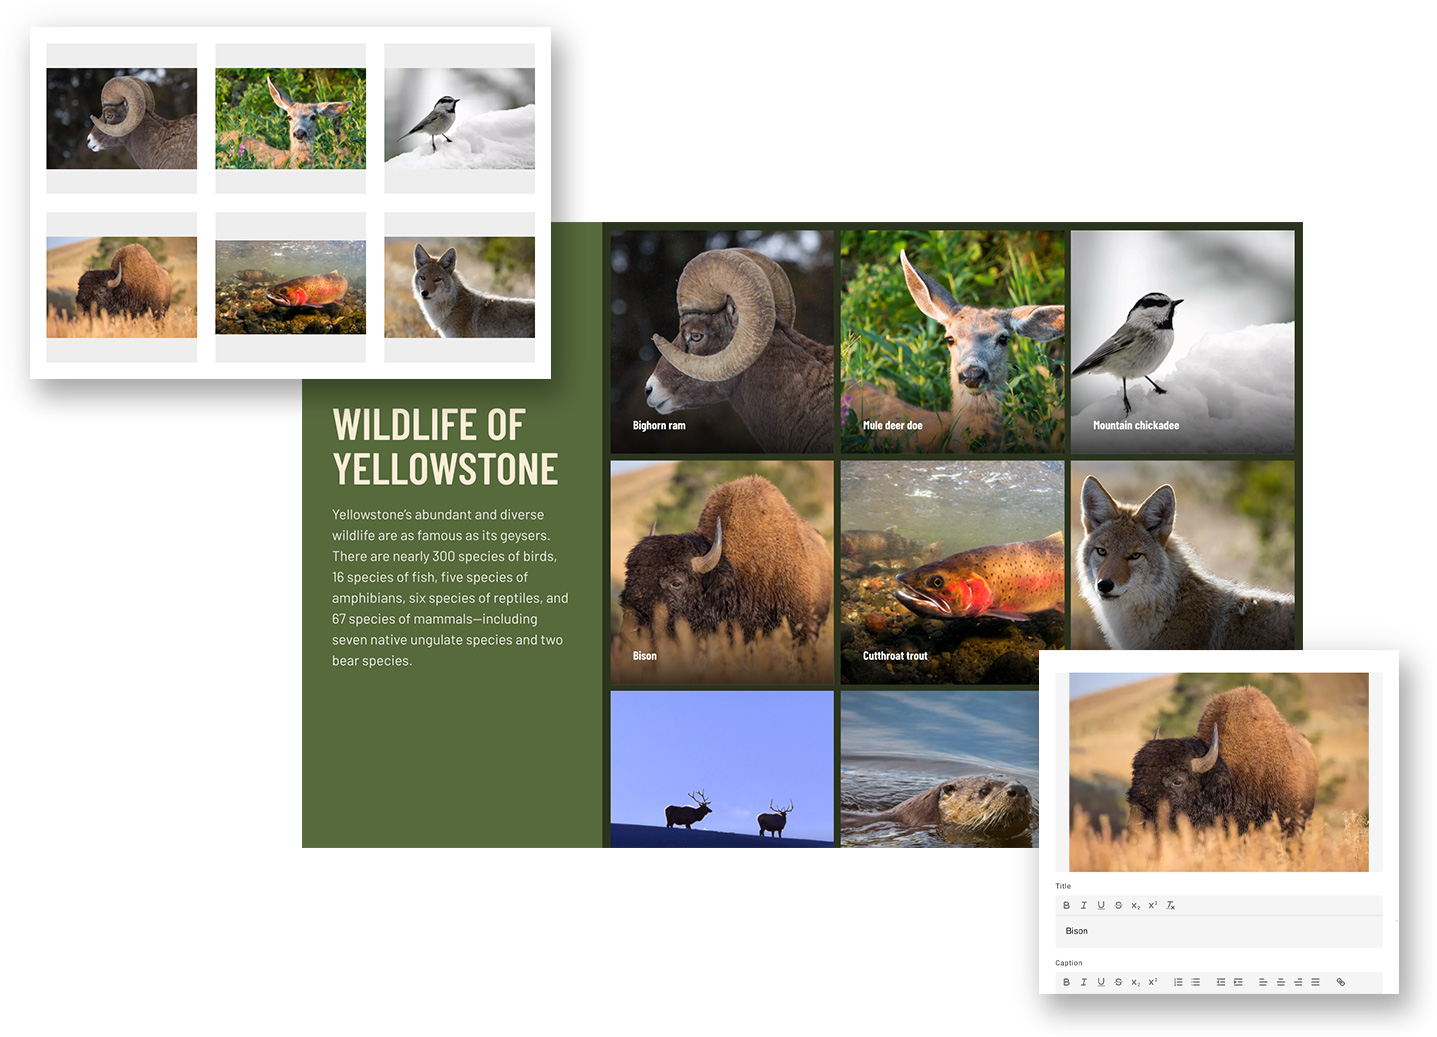
Gallery
To make a gallery story, simply add assets from the library. The editor lets you view and rearrange all of the items in your gallery. Any titles, captions, and credits that you added to the original asset in the library are copied to the version in the gallery. You can also customize this metadata, and even crop the image, without affecting the original version in the library.
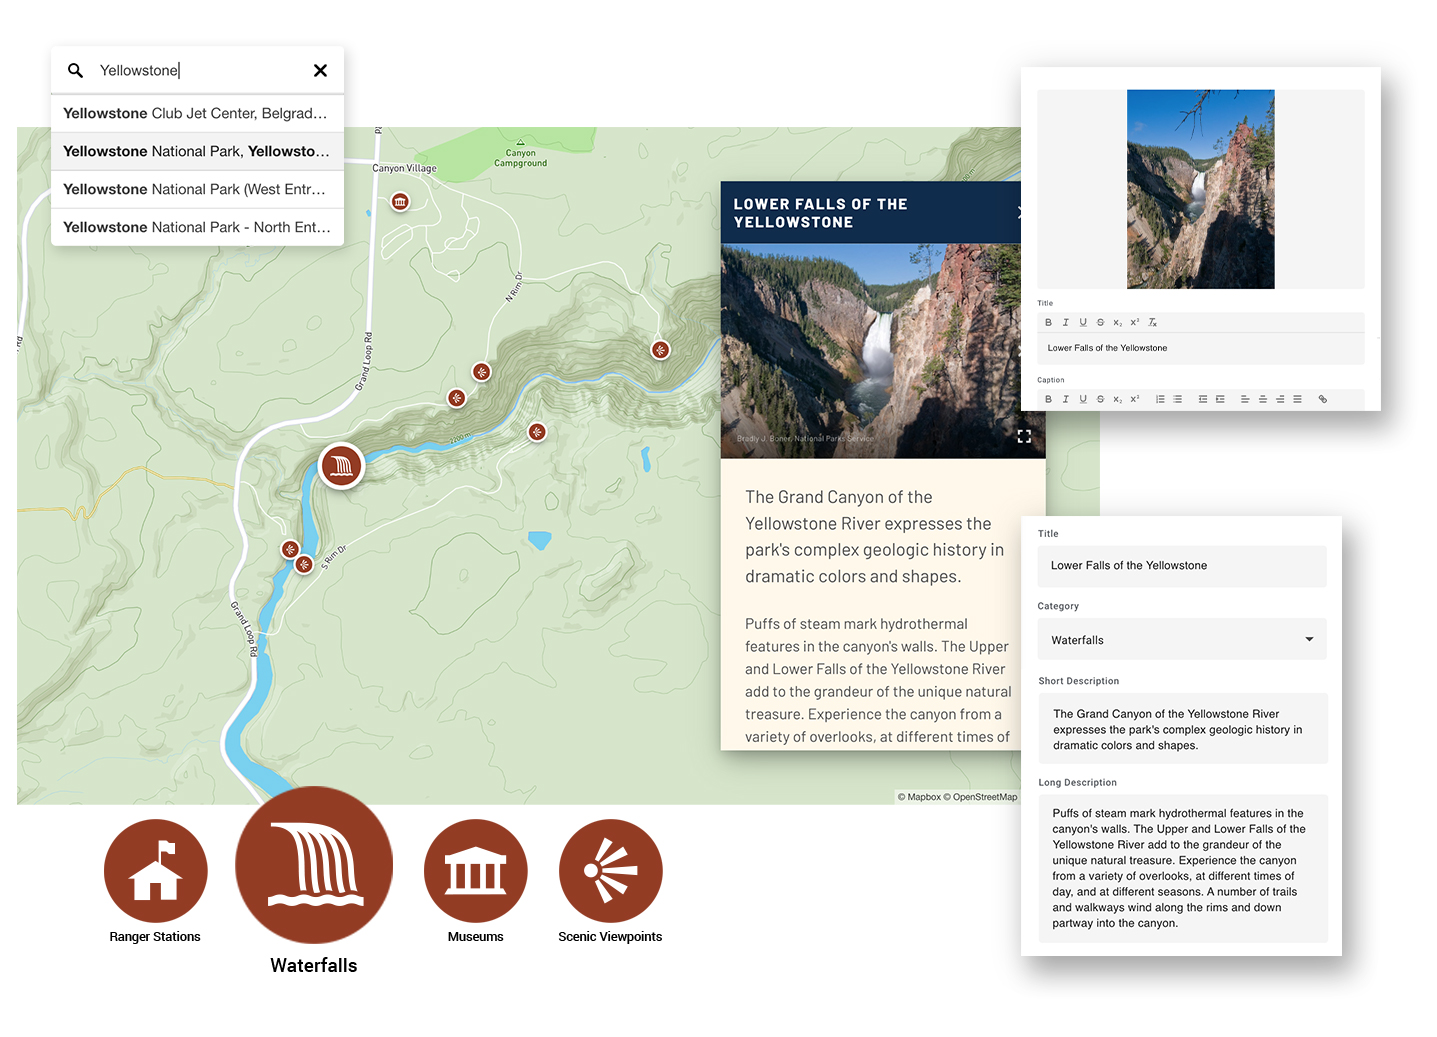
Map
When bulding a map story, you start by selecting a basemap from our library of map styles. Then you add places to the map. Each location lets you position both the latitude and longitude, as well as the zoom level, letting you control how close the map should zoom. In addition to details such as the location’s name and description, you can also assign categories with customizable colors and icons. By default, map stories are set up for random exploration. But they also support a linear structure, so that a sequence of locations can be followed as a guided tour.
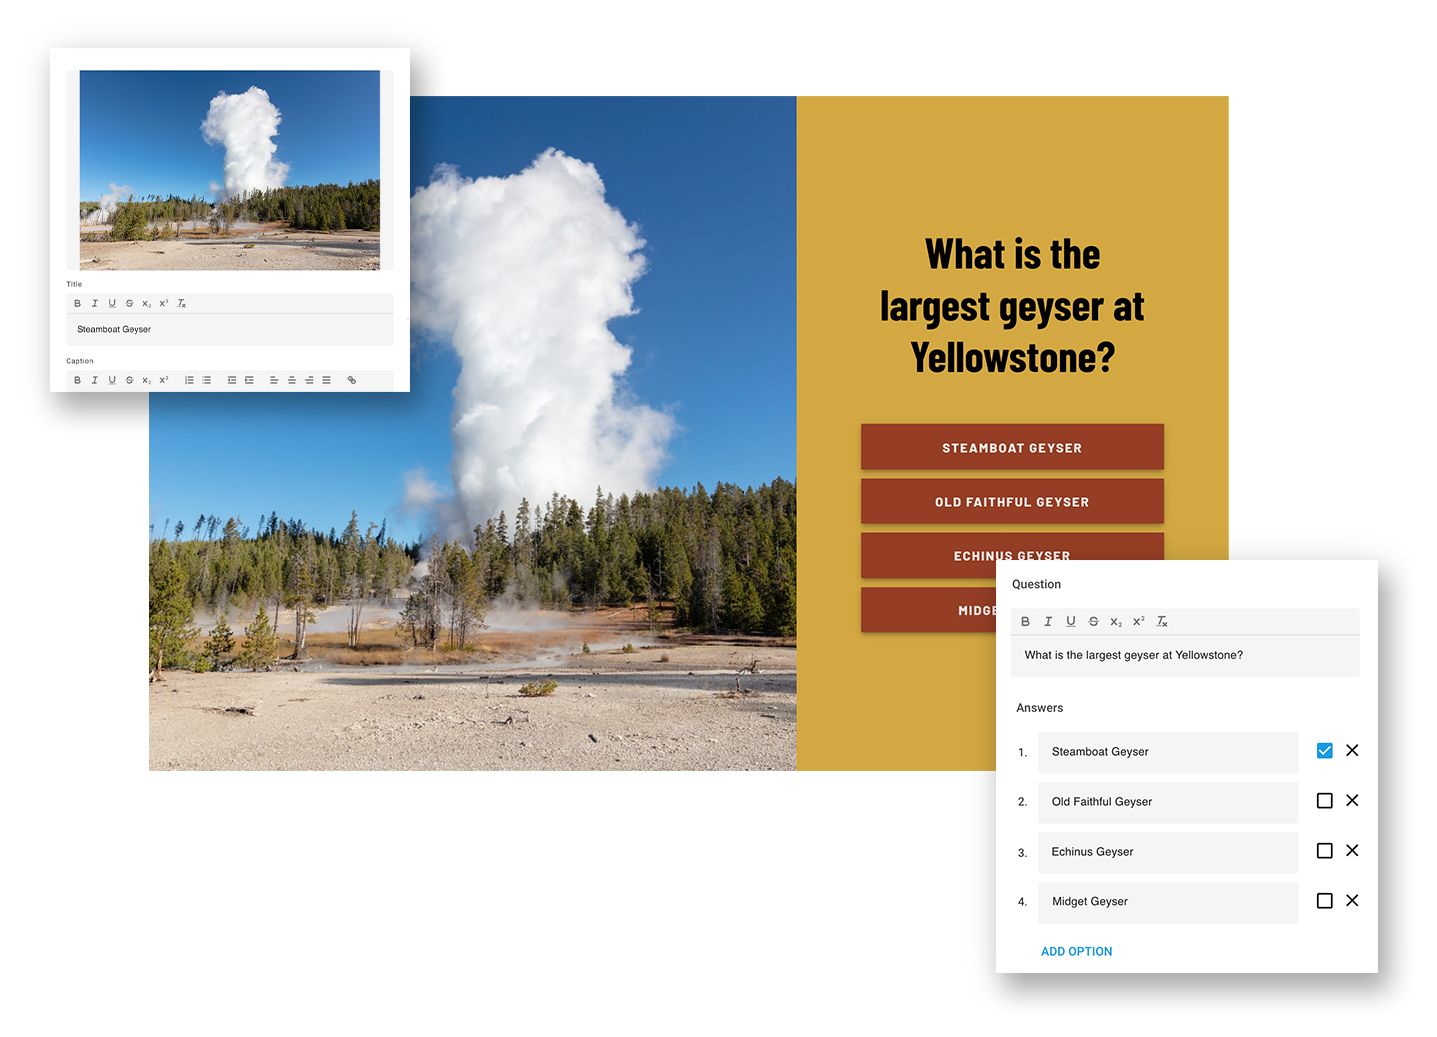
Quiz
Start by creating a series of questions, possible answers to those questions, and responses for if a user gets the answer right or wrong. You can add assets to the question and to the feedback screen where the user finds out if they got the answer right or wrong. You also customize what happens at the end of the quiz, such as showing a number or percentage of correct answers. You can even give different conclusions based on how many answers the user got right.
Custom Stories
In addition to our five core story types, Storycrafter also supports custom stories and applications. In these cases, Storycrafter functions as a headless CMS, giving you tools to manage the content that is used in unique story experiences developed by your team. Data is structured to meet your application’s requirements, and digital assets are rendered based on what your application needs.
Step 3
Add Stories to a Project
Projects are containers that hold your stories. Some projects may have just a single story. But you can also create larger projects with multiple stories. For example, you might create a project that contains a map, gallery, and multiple slideshows. These stories would all be linked from a main menu. Stories aren’t limited to a single project, either. The same story can be used in as many different projects as you would like.
Step 4
Share Your Project

Websites
Storycrafter projects can be embedded in any standard web page, much like how you embed a YouTube video. They work with all popular web content management systems, including WordPress, Drupal, Joomla, Squarespace, Wix, and Weebly. Simply add the embed code where you would like to display your project. You can embed your project in as many places as you’d like.
See this in action
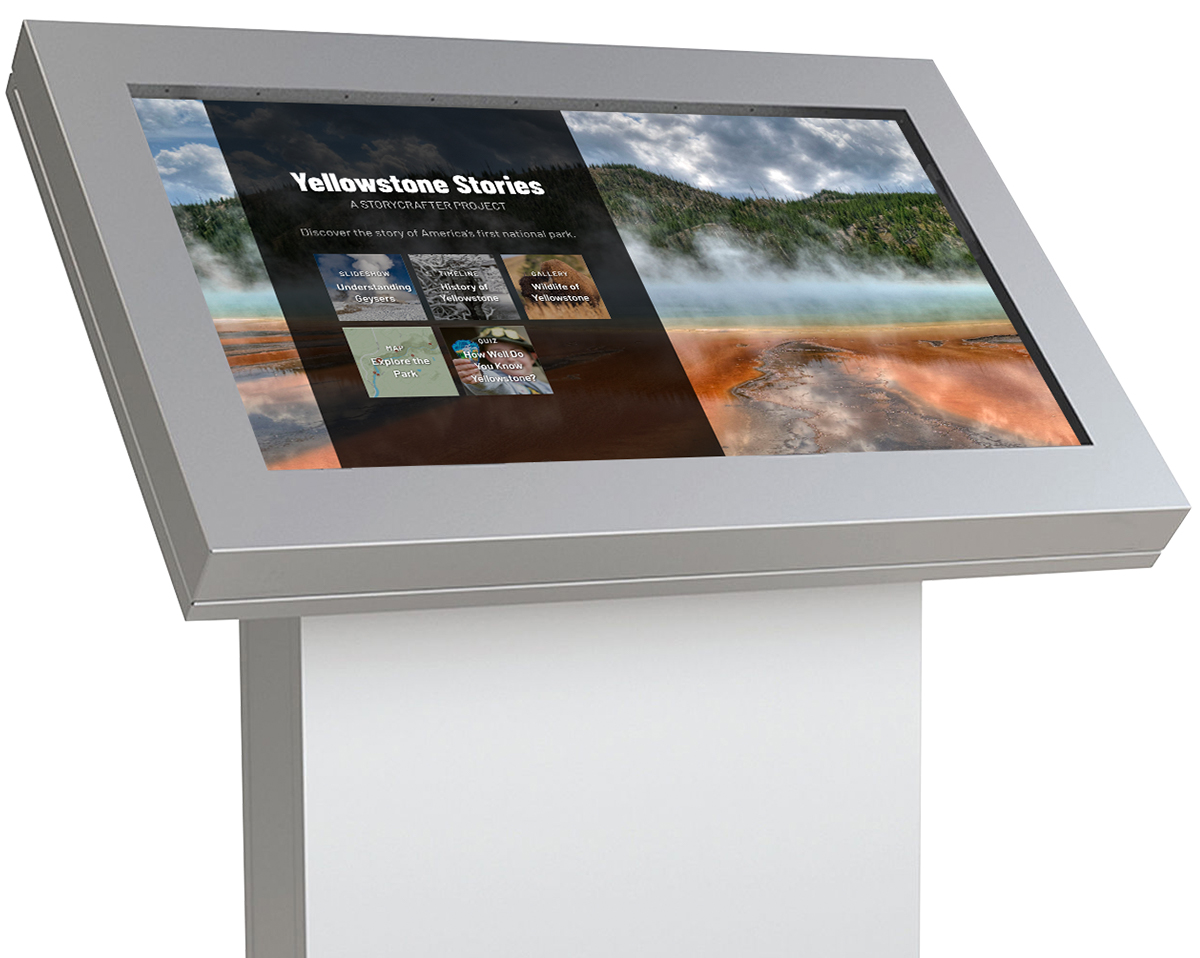
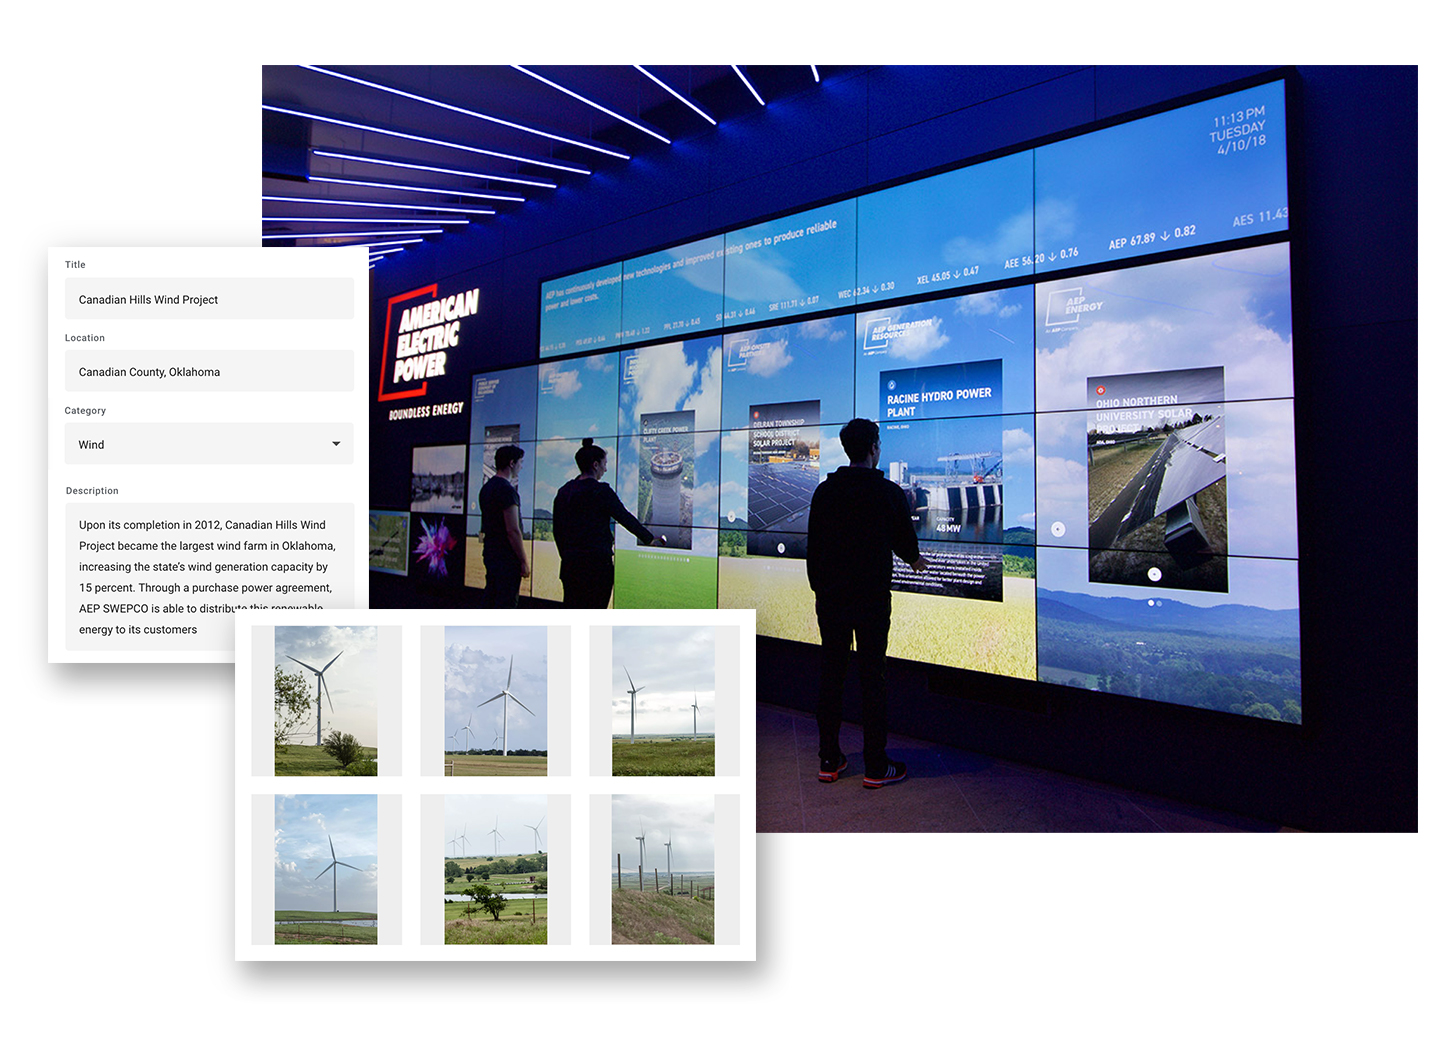
Touchscreens
A project can also be presented on kiosks and touchscreens in exhibitions, visitors centers, lobbies, and other locations. A stand-alone application, installed on the local computer, connects to your Storycrafter account and downloads the entire project. Whenever you make content updates, just re-publish the project. Since the project content is stored locally, most stories can be displayed without the need for an always-on network connection.
See it in action
Step 5
Measure Your Results
Storycrafter has a built-in analytics system, so you can track and measure user metrics. You can see both the numbers of sessions and the average session durations for both entire projects and individual stories. You can also compare usage of projects on the web with those on kiosks. If you have built multiple-language versions of your projects, reports also show the usage of each language.

Ready to use Storycrafter for your project?
We offer a range of options to meet your needs, from turn-key solutions to backend-only integrations.